我们将构建什么
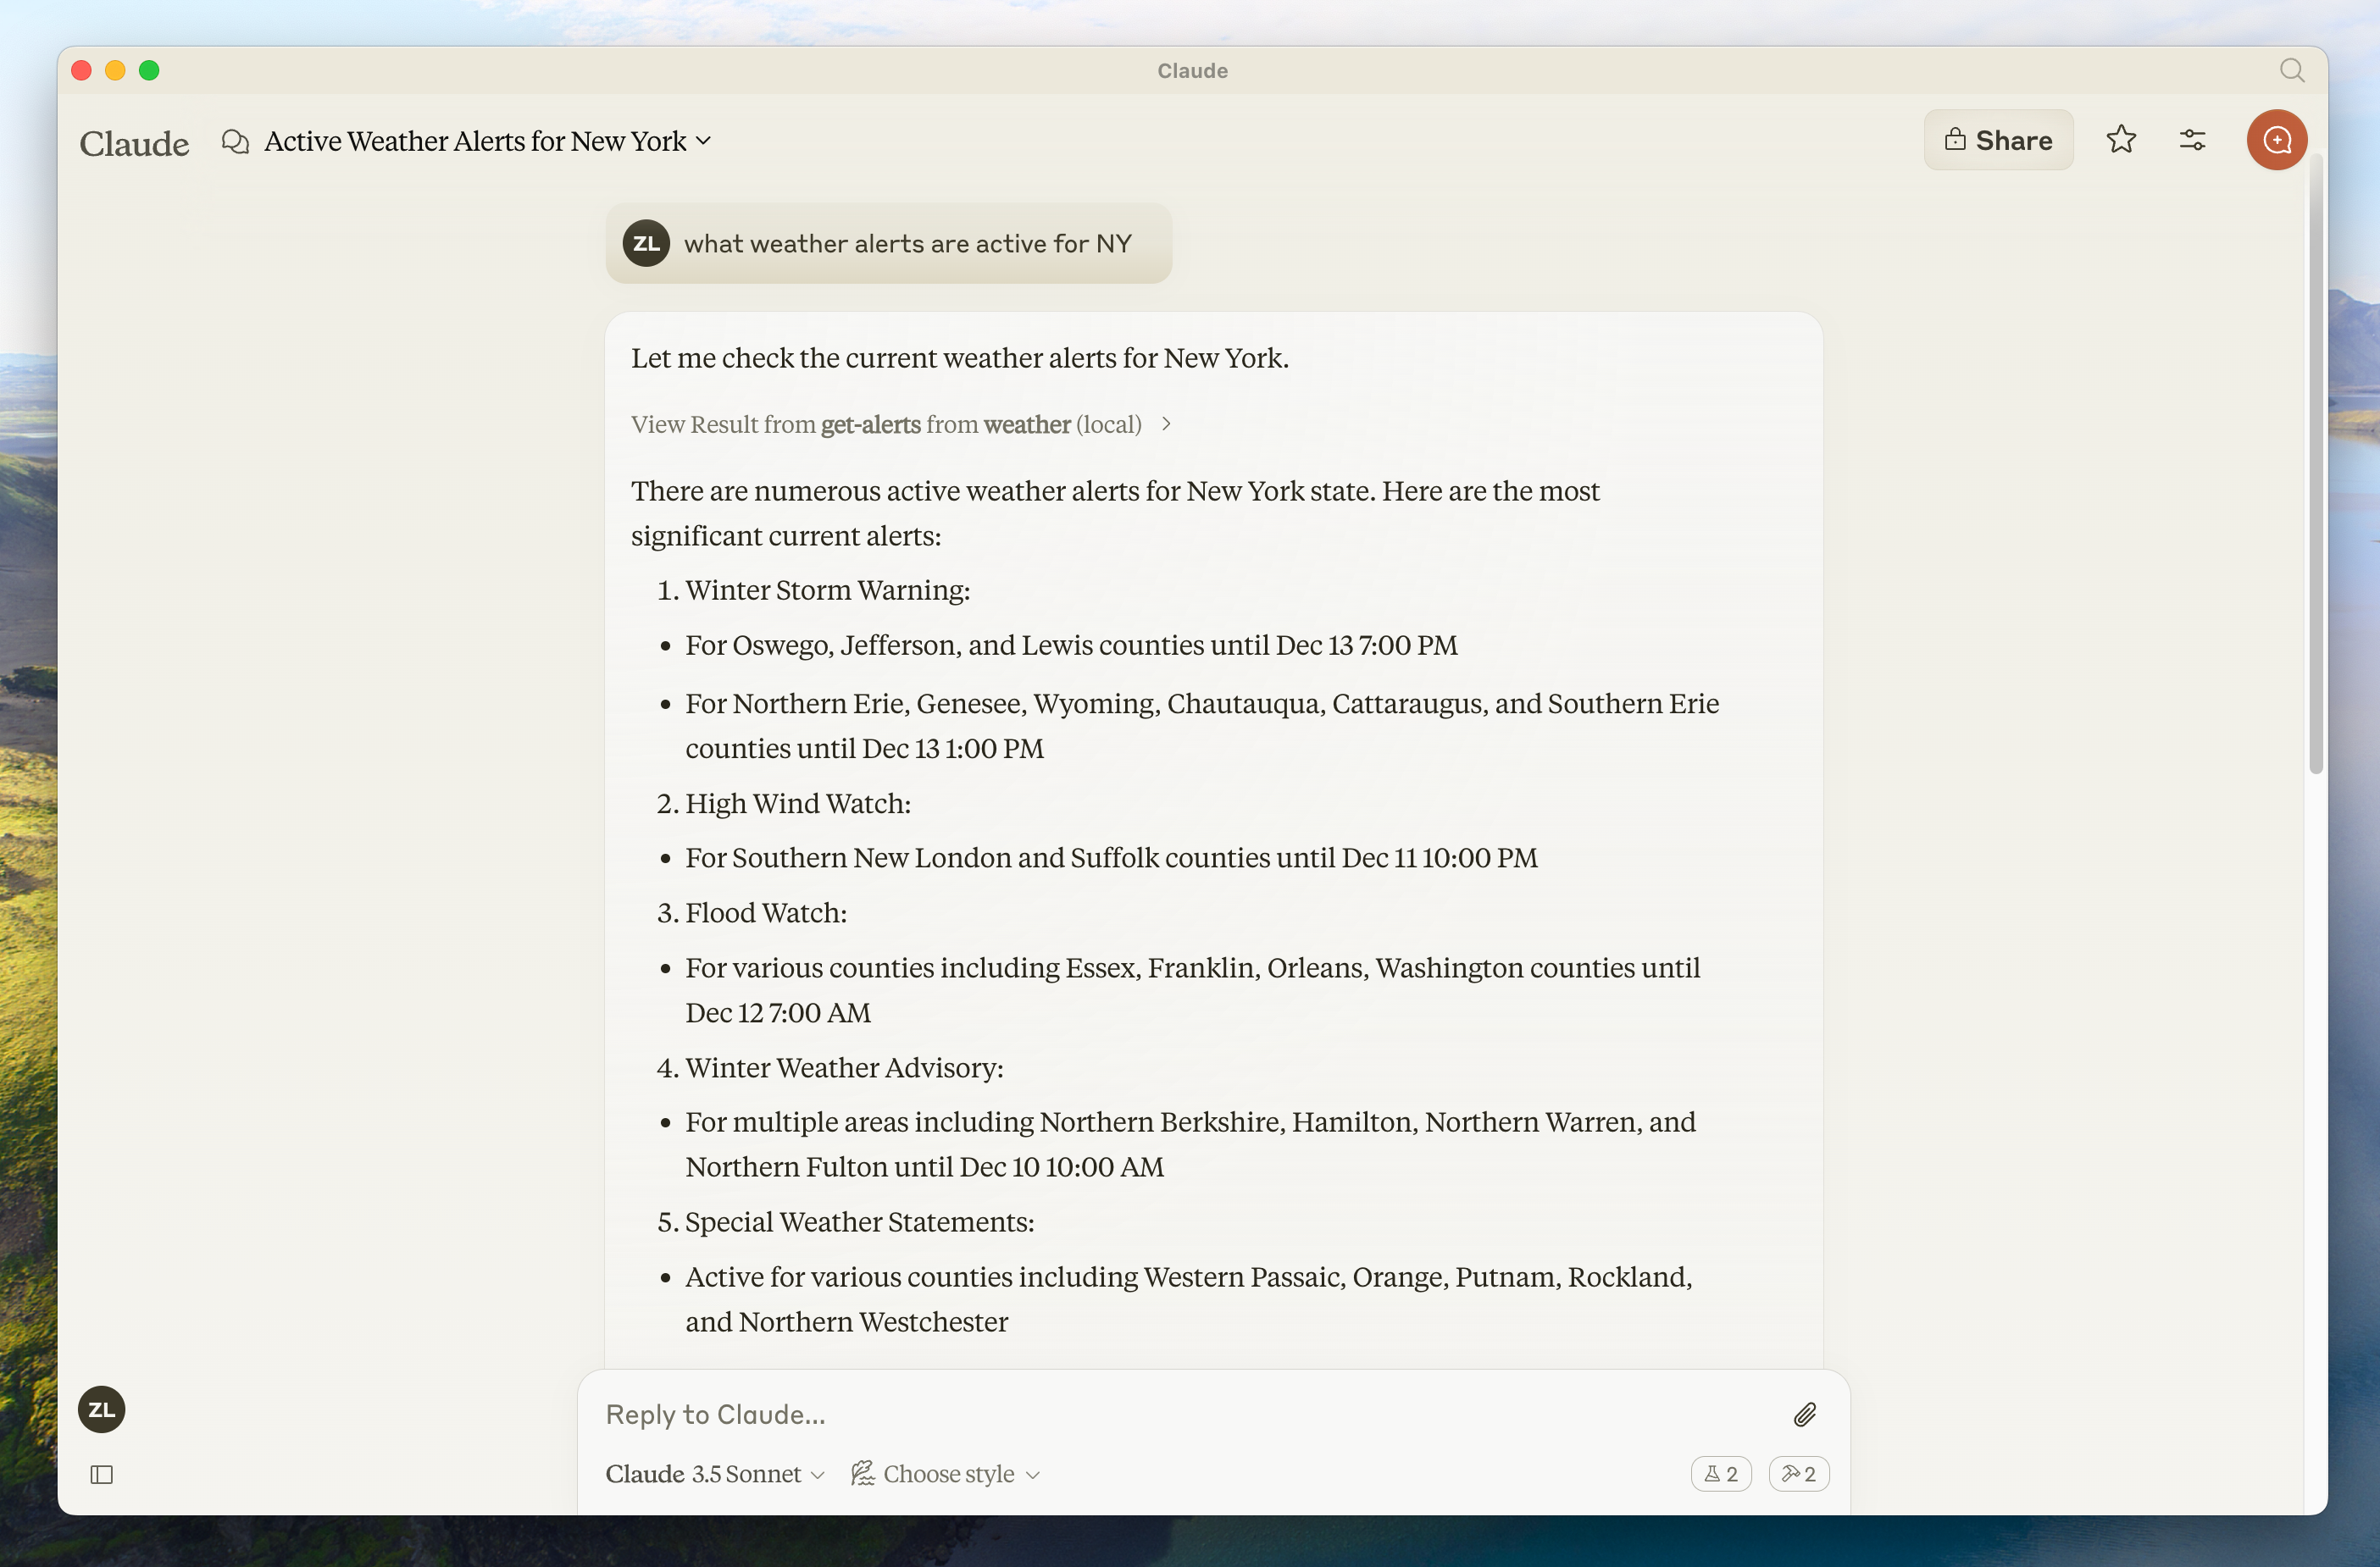
许多 LLM 目前不具备获取天气预报和恶劣天气警报的能力。让我们使用 MCP 来解决这个问题! 我们将构建一个服务器,它暴露两个 tools:get-alerts 和 get-forecast。然后,我们将服务器连接到一个 MCP host(在本例中是 Claude for Desktop):
服务器可以连接到任何 client。我们在这里选择 Claude for Desktop 是为了简单起见,但我们也有关于构建你自己的 client 的指南以及其他 clients 列表。
为什么选择 Claude for Desktop 而不是 Claude.ai?
为什么选择 Claude for Desktop 而不是 Claude.ai?
因为服务器是本地运行的,所以 MCP 目前仅支持 desktop hosts。远程 hosts 正在积极开发中。
核心 MCP 概念
MCP 服务器可以提供三种主要类型的能力:- Resources: 可以被 clients 读取的类文件数据(如 API 响应或文件内容)
- Tools: 可以被 LLM 调用的函数(需要用户批准)
- Prompts: 预先编写的模板,帮助用户完成特定任务
- Python
- Node
- Java
- Kotlin
- C#
让我们开始构建我们的天气服务器!你可以在这里找到我们将构建的完整代码。之后请务必重启你的终端,以确保 现在让我们深入构建你的服务器。FastMCP class 使用 Python type hints 和 docstrings 来自动生成 tool definitions,从而轻松创建和维护 MCP tools。你的 server 已经完成!运行 首先,确保你已安装 Claude for Desktop。你可以在这里安装最新版本。 如果你已经安装了 Claude for Desktop,请确保它已更新到最新版本。我们需要为你想要使用的任何 MCP servers 配置 Claude for Desktop。为此,请在文本编辑器中打开 然后,你将在 这告诉 Claude for Desktop:
前提知识
本快速入门假设你熟悉:- Python
- LLMs,如 Claude
系统要求
- 已安装 Python 3.10 或更高版本。
- 你必须使用 Python MCP SDK 1.2.0 或更高版本。
设置你的环境
首先,让我们安装uv 并设置我们的 Python 项目和环境:uv 命令被识别。现在,让我们创建并设置我们的项目:构建你的服务器
导入 packages 并设置 instance
将这些添加到你的weather.py 文件的顶部:Helper functions
接下来,让我们添加 helper functions,用于查询和格式化来自 National Weather Service API 的数据:实现 tool execution
Tool execution handler 负责实际执行每个 tool 的逻辑。让我们添加它:运行 server
最后,让我们初始化并运行 server:uv run weather.py 以确认一切正常。现在让我们从现有的 MCP host,Claude for Desktop 测试你的 server。使用 Claude for Desktop 测试你的 server
Claude for Desktop 尚不适用于 Linux。Linux 用户可以继续阅读 构建 client 教程,以构建一个连接到我们刚刚构建的 server 的 MCP client。
~/Library/Application Support/Claude/claude_desktop_config.json 中的 Claude for Desktop App configuration。如果该 file 不存在,请确保创建它。例如,如果你安装了 VS Code:- MacOS/Linux
- Windows
mcpServers key 中添加你的 servers。只有正确配置了至少一个 server,MCP UI 元素才会显示在 Claude for Desktop 中。在本例中,我们将添加我们的单个天气服务器,如下所示:- MacOS/Linux
- Windows
Python
确保你传入的是你的 server 的绝对 path。
- 有一个名为 “weather” 的 MCP server
- 通过运行
uv --directory /ABSOLUTE/PATH/TO/PARENT/FOLDER/weather run weather.py来启动它
使用 commands 测试
让我们确保 Claude for Desktop 正在接收我们在weather server 中暴露的两个 tools。你可以通过查找锤子 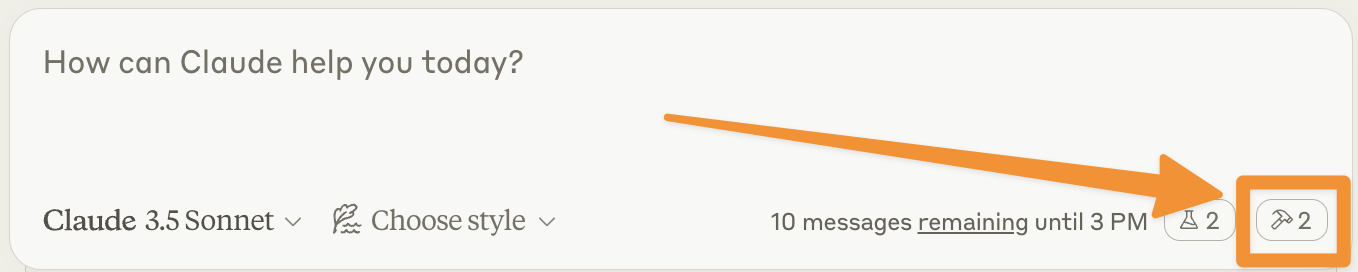

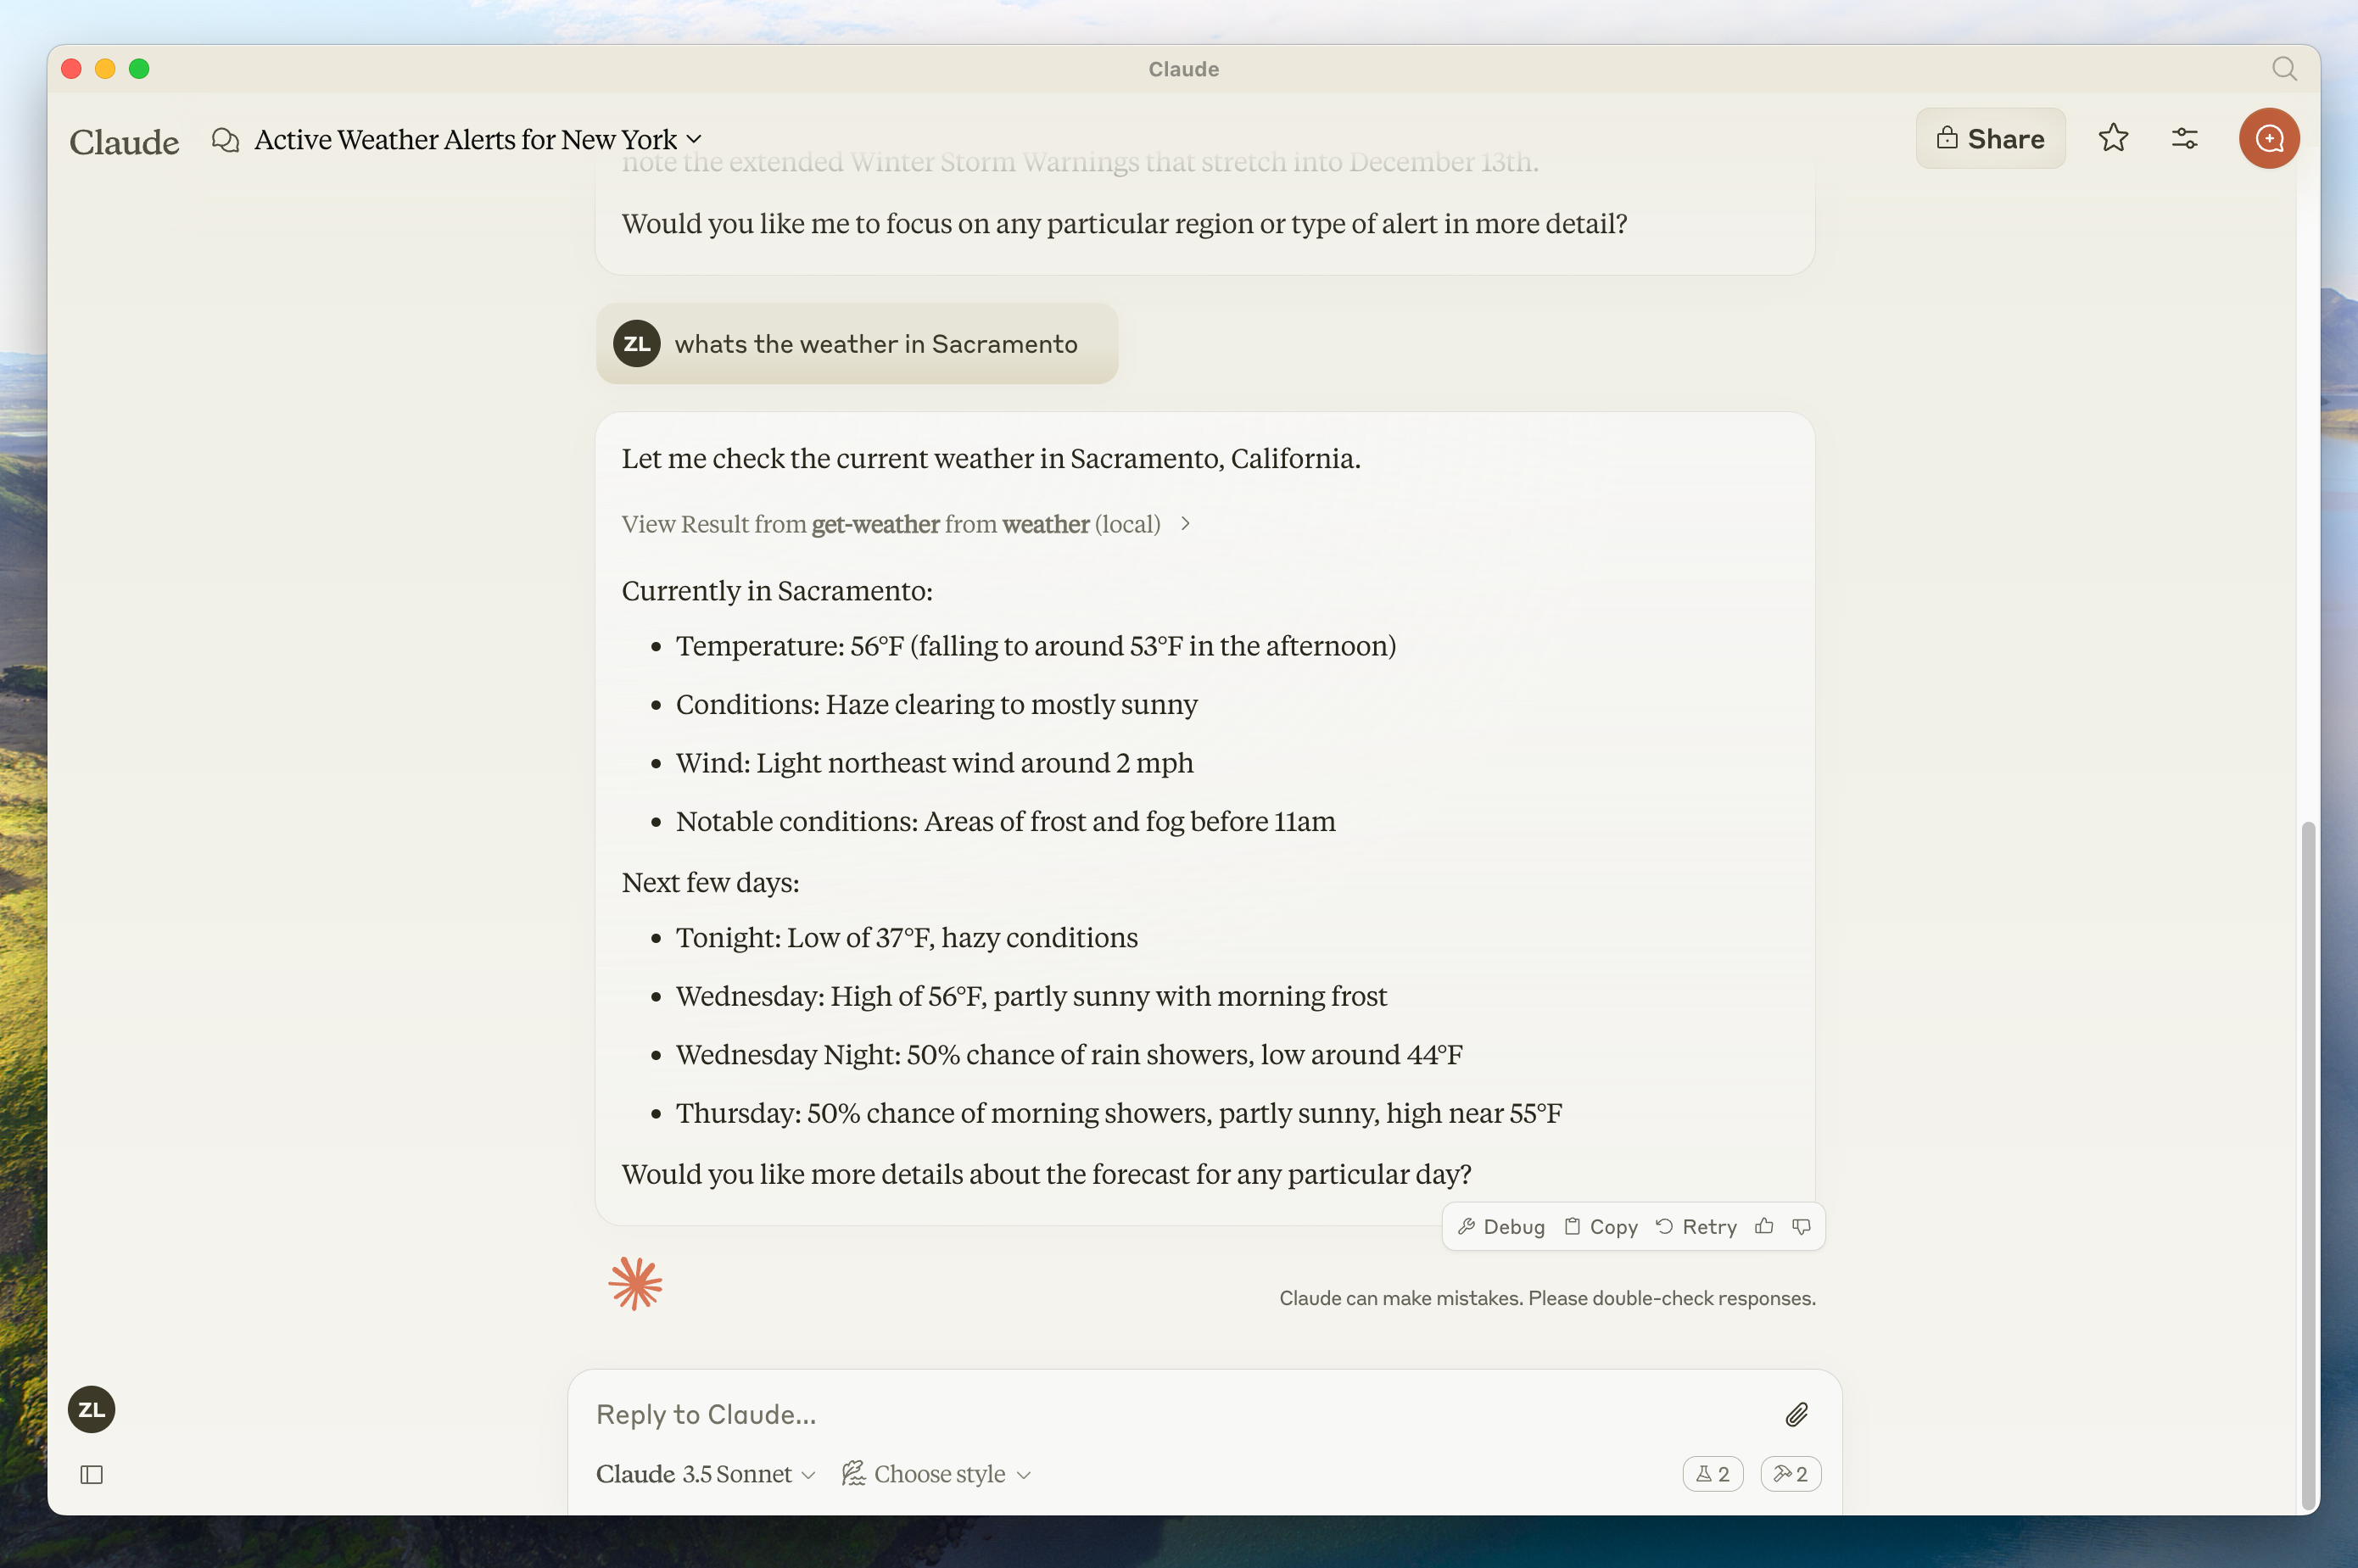
- Sacramento 的天气怎么样?
- Texas 有哪些活跃的天气警报?
由于这是美国国家气象局,因此查询仅适用于美国的位置。
底层发生了什么
当你提出问题时:- client 将你的问题发送给 Claude
- Claude 分析可用的 tools 并决定使用哪些 tool
- client 通过 MCP server 执行选择的 tool
- 结果被发回给 Claude
- Claude 制定自然语言响应
- 响应显示给你!
故障排除
Claude for Desktop 集成问题
Claude for Desktop 集成问题
从 Claude for Desktop 获取 logs与 MCP 相关的 Claude.app 日志被写入 Server 未在 Claude 中显示
~/Library/Logs/Claude 中的 log files:mcp.log将包含关于 MCP 连接和连接失败的通用 logging。- 名为
mcp-server-SERVERNAME.log的 Files 将包含来自命名 server 的错误 (stderr) logging。
- 检查你的
claude_desktop_config.jsonfile 语法 - 确保你的项目的 path 是绝对路径而不是相对路径
- 完整重启 Claude for Desktop
- 检查 Claude 的 logs 中是否有错误
- 验证你的 server build 和运行是否没有错误
- 尝试重启 Claude for Desktop
Weather API 问题
Weather API 问题
错误:Failed to retrieve grid point data(未能检索网格点数据)这通常意味着:
- 坐标在美国境外
- NWS API 存在问题
- 你正受到速率限制
- 验证你是否正在使用美国坐标
- 在请求之间添加少量延迟
- 检查 NWS API 状态页面
有关更高级的故障排除,请查看我们的 MCP Debug 指南